8 weeks to Victory! An 8-week veggie patch from scratch, in a rental
Author: Kirsten Bradley
Go to Source
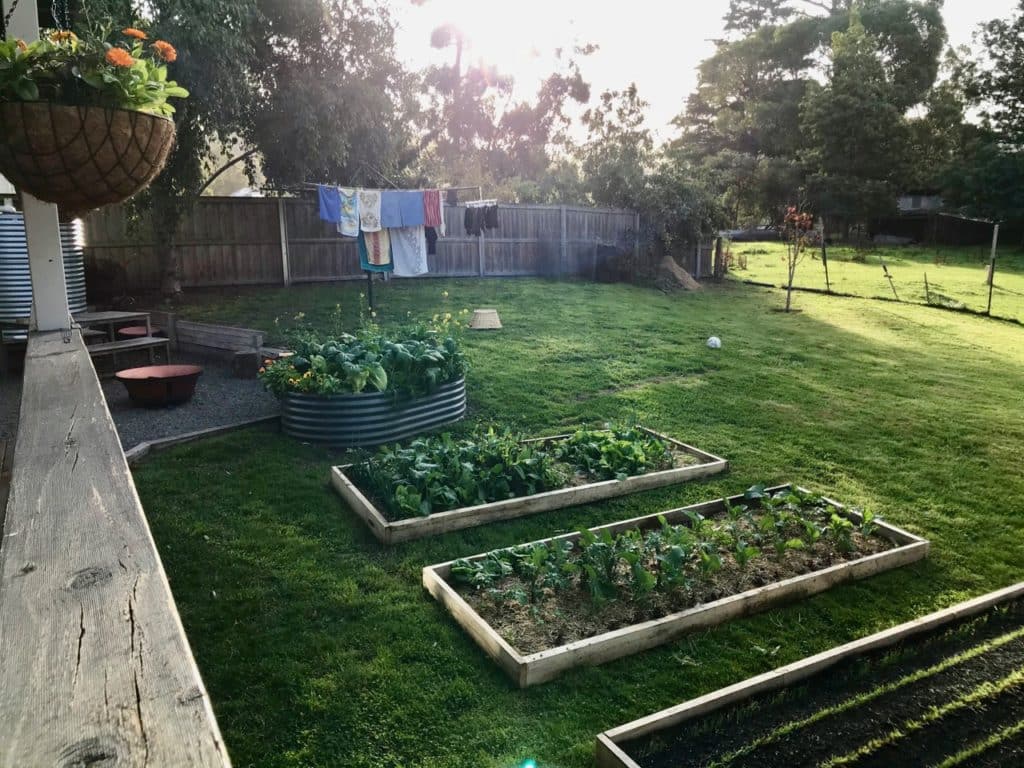
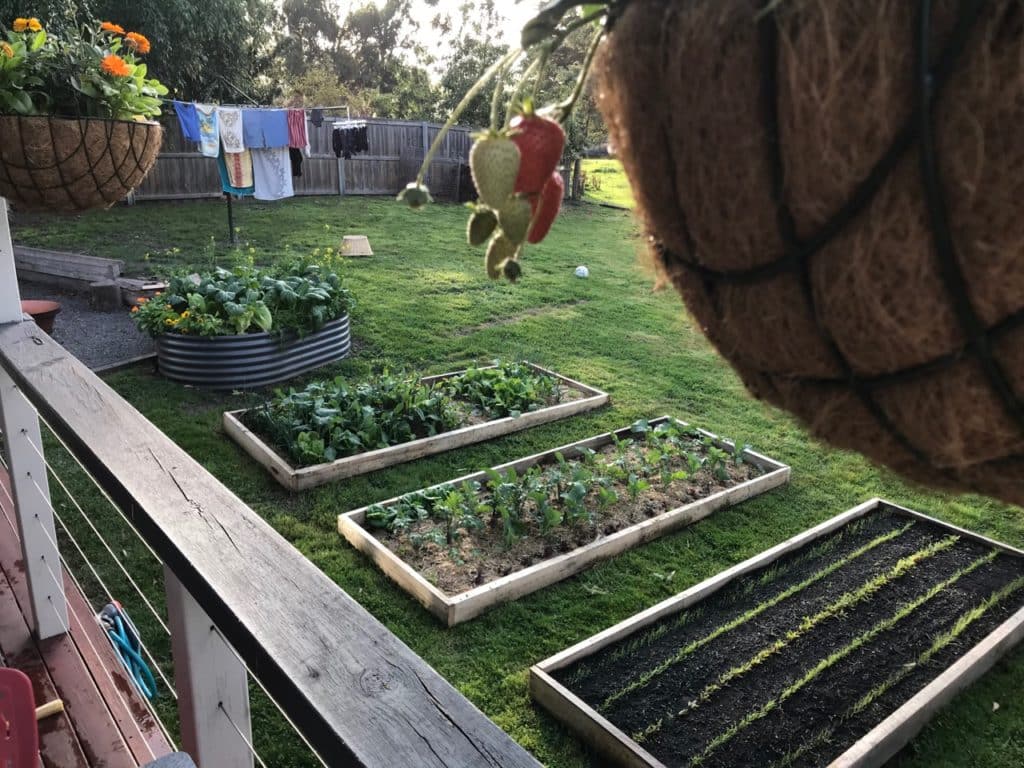
Are you starting a veggie patch right now? Take heart! 8 weeks ago, our backyard was just scruffy grass, with not a thing to eat. Now, it’s feeding our family daily. And yes, we’re renting. Come and take a look – soon, this could be you!
We’ve put together this little portrait of our current patch to show you where your veggie production could be in a month or two, even if you’re renting, if you start now.
We have gardened for many years, in a variety of climates, but this particular backyard patch is 8 weeks old, with the input of two adults who are working full-time (and now also unexpectedly home-schooling until further notice). If you have more time than us, you could definitely do and grow a lot more food than we have these last 8 weeks.
We don’t have heaps of time. But home grown veg has always been a priority for us – so when we moved into this place, we got digging and doing.
This article is part of our Permaculture Living 2020 series – one everyday climate action for you, each week. Now, during this pandemic, these ideas for self reliance, cultivating community and creating a liveable world for all, are even more important. Make sure you’re subscribed to our newsletter so you get more good ideas, tips and tricks, each and every week.
We started this garden at the end of January this year – after a month of bushfires and moving house (fun times!). We knew the minute we were settled enough, that we’d get started on the backyard garden.
Here’s what we did, and how you can do it, too.
Planning and placing the beds
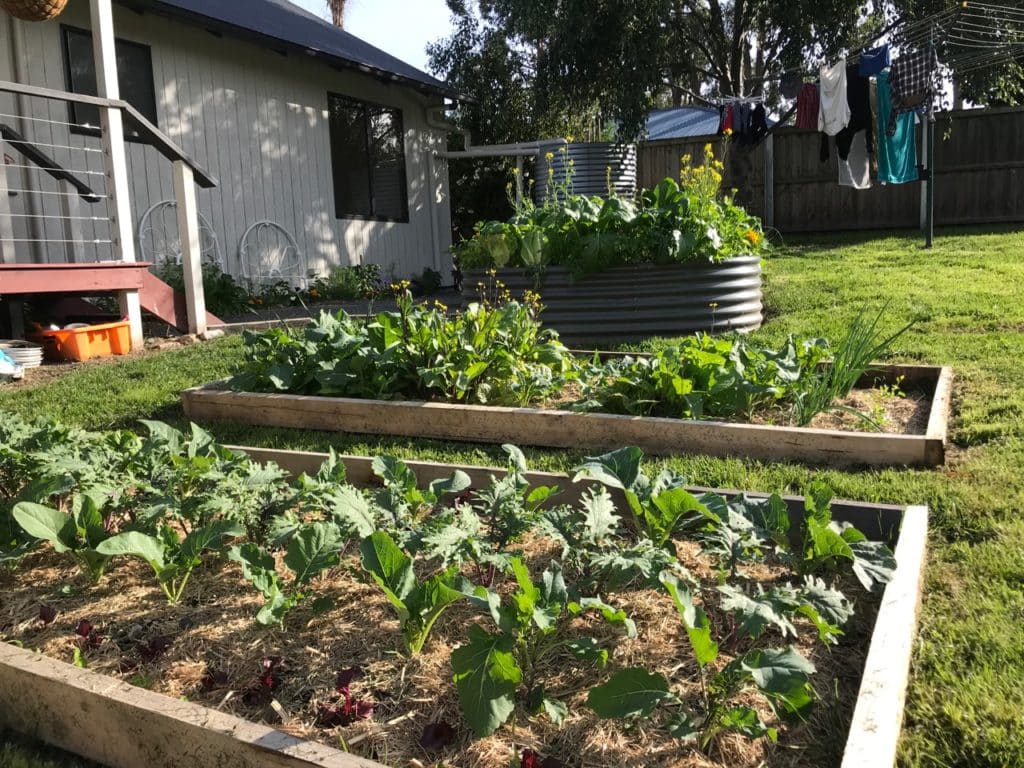
Our backyard faces north, which is great, and we live in Southern Tasmania. This means that maximising solar gain for our veggie beds is important – as the winter nights here in southern Tassie are loooong, and the winter sun is low.
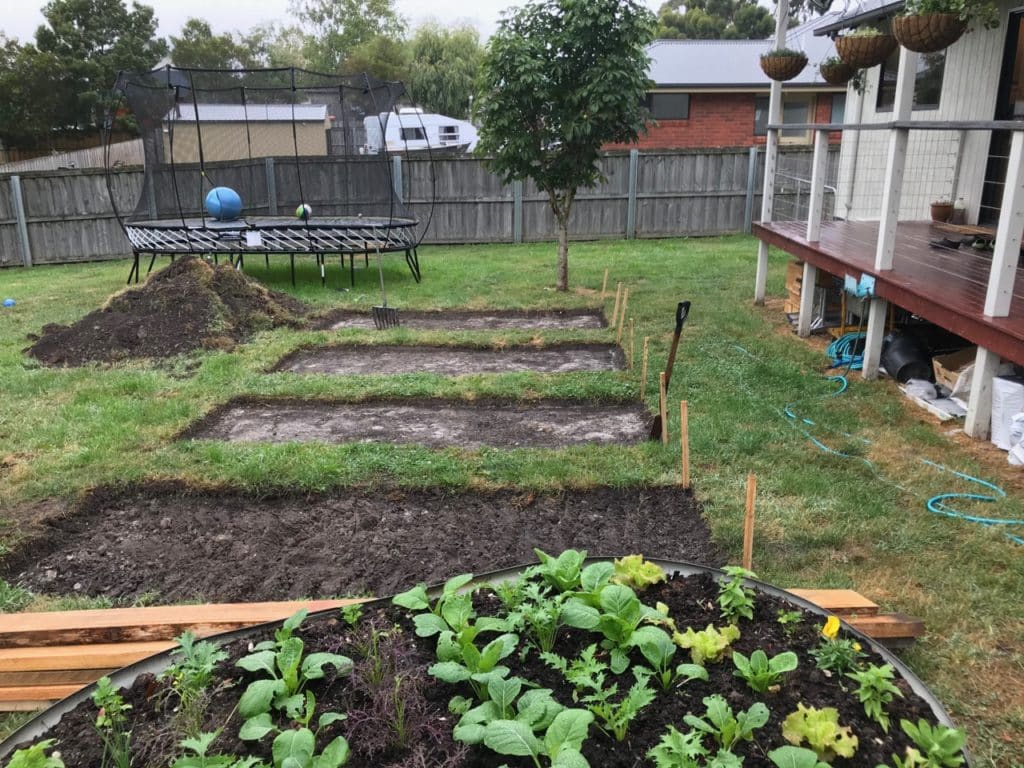
We aligned the beds north/south so we could maximise winter sun when we planted in rows. We also placed the beds close to the house for ease of care and harvest, and so there was some free space down the back of the yard for our kiddo to do his thing.
We were aware that creating new beds does take a bunch of work, so rather than going big at the start (and then not having the time/energy to finish it all), we started by placing just four new beds – about 1.2m wide by 3m long.
The property had one old ‘tank bed’ full of soil and weeds up against the fence, so we hauled that down the yard to place it next to the other beds. Because this bed was already full of soil, we planted this bed first (once we’d decanted it’s soil, moved it, then put the soil back in).
We made sure the beds were far enough apart for a lawnmower to pass between them. And we kept the beds placement and design neat, neat, neat. In our experience, a very neat vegetable garden makes for far less grief with landlords (especially if… ahem… you’re planning on asking forgiveness, rather than permission, when it comes to digging up your lawn).
If this were our own place, we would do the paths (and the whole design, actually) quite differently, with a longer-term view to the whole backyard system. But there we were – renting, and wanting homegrown food, asap. Best to keep things quick, simple, and cheap.
If you’re trying to figure out where to place some veggie beds at your place, you could start by:
- Mapping the Sun on your site
- Creating a base map of your backyard (if you’re really keen)
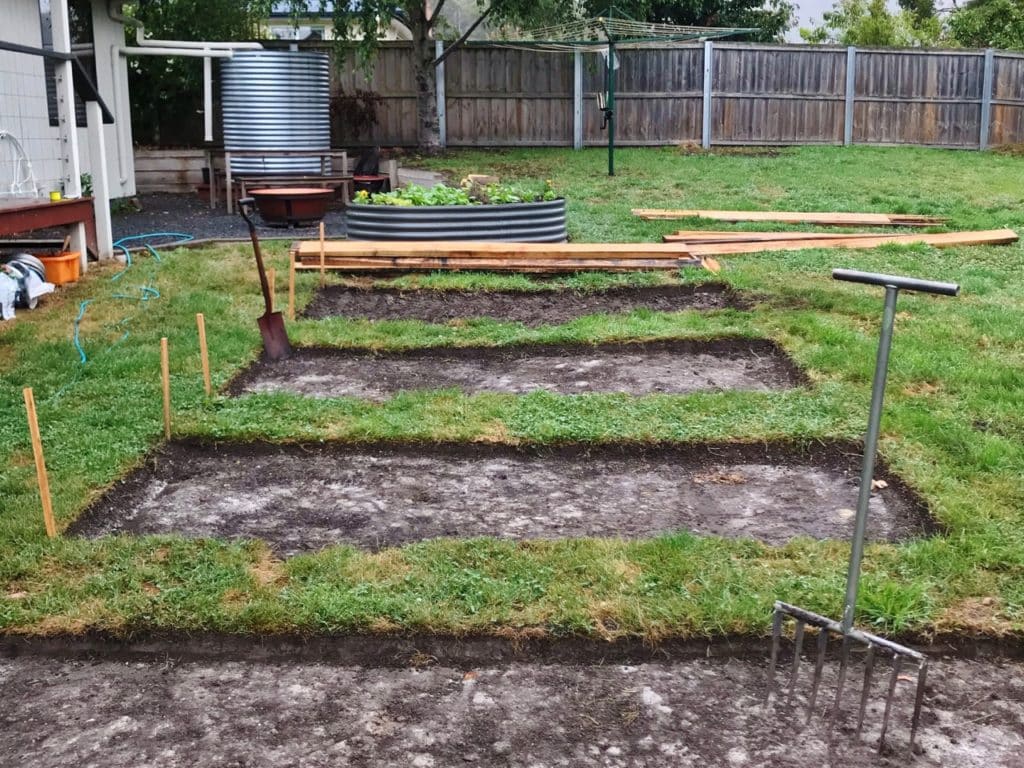
Making the beds
Now, there are a LOT of ways to create a bed to grow food in, not just the technique we used this time. No dig, strawbale beds, and so many other ways. But we opted for double-dig beds here because:
- Time was a factor – we wanted veggies fast
- We didn’t want to buy soil or compost in, if we could help it
- We wanted veggies fast (yes, I just said that twice)
So, here’s the thing. Creating veggie beds takes time, energy and inputs. Time for the strawbale to compost down, energy in either your digging or the fossil fuels used to get resources, and inputs in the form of whatever you gather to make the garden.
So – do your planning and your balance sheet. If you have lots of time before you need a harvest, and lots of inputs, but not much energy, a no-dig bed is awesome. If you have no time, but lots of energy and inputs, raised beds might be the go for you.
BUT if you have lots of energy but limited access to inputs, and you want veggies fast, double digging your beds in the biointensive style is a great option to consider. Plus, you get fit – without leaving your backyard. Win win win.
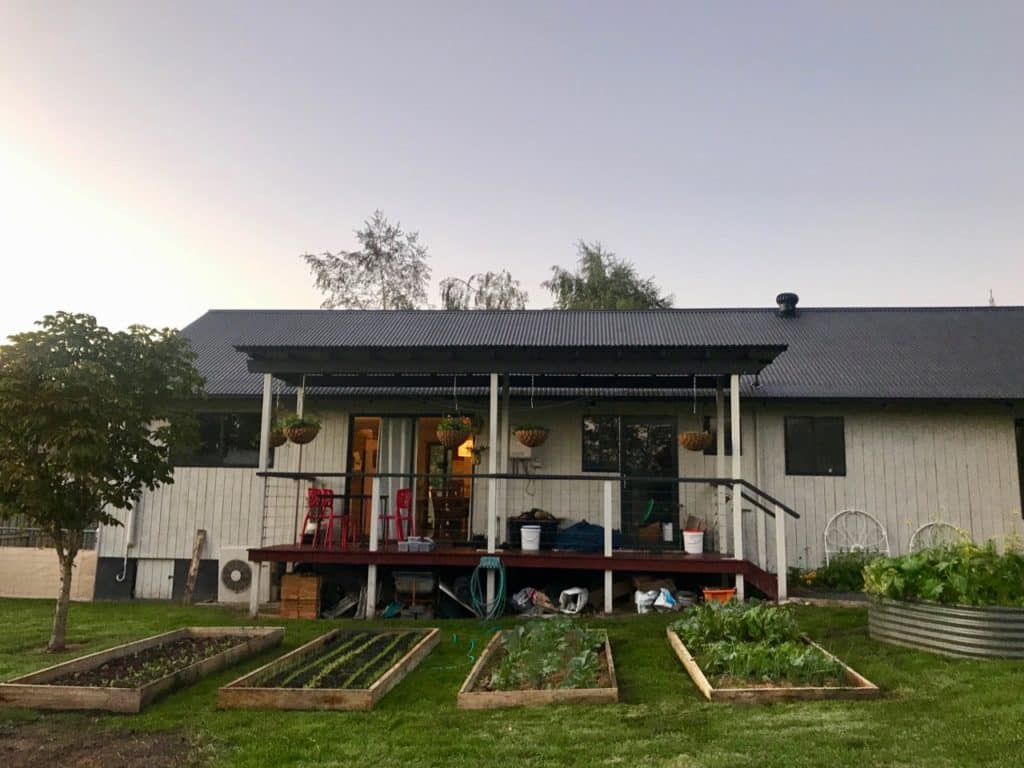
Constructing the bed surrounds
We did this as we’ve done before in 12-month rental gardens, by making bed surrounds out of scrap timber. It’s pretty straightforward. A square or rectangle, plonked on the bed.
Use weed guard if you can find some, or prepare to weed the edges if not. Weeds around the edges of four beds, we can deal with. We’re at home until further notice anyways.
Preparing the beds
As said above, we’re in a position where we had energy, but limited time (we wanted a fast harvest), plus we wanted to avoid using too many inputs if possible.
So. Double-digging it was. If you do this right the first time, you don’t need to do it again for quite a few years. And the inputs are minimal – just a bit of compost, for the top layer.
If you can’t get compost, just go with the topsoil you have, and decide on some soil-feeding strategies (below) to help improve what you’ve got to work with.
- Double digging a garden bed
- De-lawning + completing garden beds like the ones described above
- An overview of no-dig and double-dig techniques (in an article about growing great tomatoes)
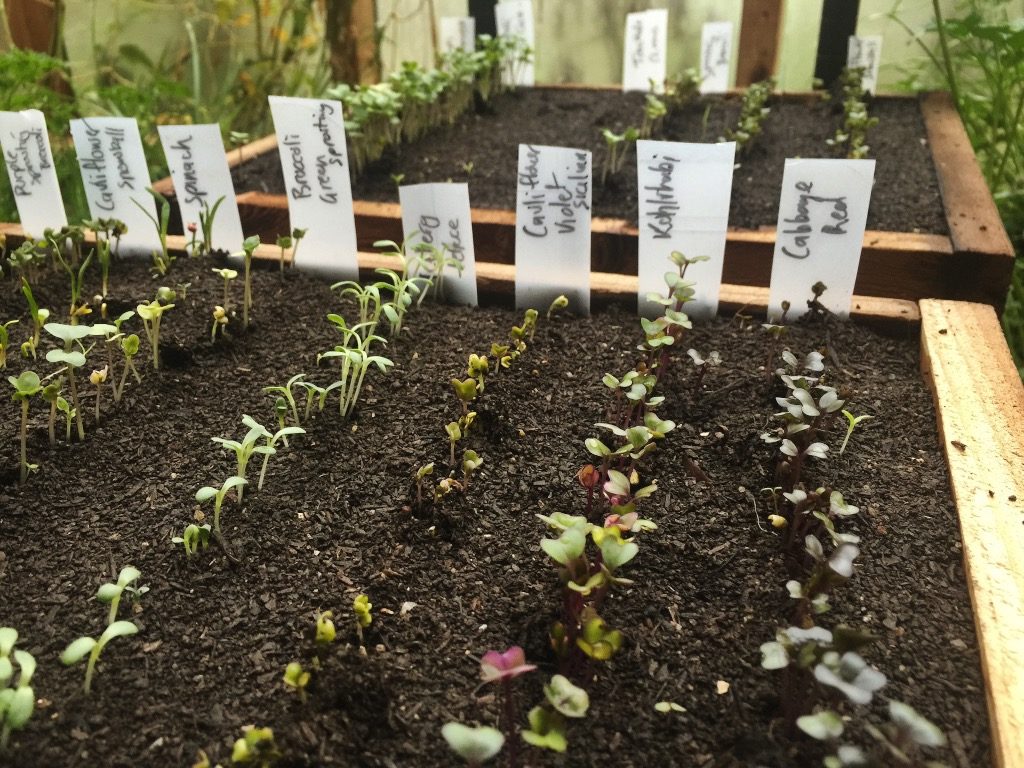
Sourcing seedlings and seeds
For this garden, we planted mostly seedlings, from a local supplier. For many folks, seedlings are in short supply right now, at time of writing. If this is you – source some seeds, and get planting those, using the seed raising mix recipe above.
If you’re finding seeds hard to source, check with your local community garden, ask on your local community group page. There will be something. OR, check out your spice cupboard – do you have fennel seeds? Coriander seeds, mustard seeds, celery seeds? Whole garlic cloves? Start with those – some may not work, but many will. See what else you can source from the shops. Something is better than nothing. And keep looking for veggie seeds too.
While your seeds rise, get working on your garden beds. By the time they’re ready, you may well either have seedlings ready to go, or have sourced some seeds. Good luck.
Plant for your Season!
A note for first-time gardeners… figure out what will grow best where you live, right now. Our first tip would be to head to Gardenate online planting calendar – an awesome resource that shuld be failry accurate, no matter where you live.
You may be able to find more specific resources too – search “Grow What When” or “What to Plant in [Month] [your state/country]’. There are so, so many resources out there for this. Make sure you check them out before planting.
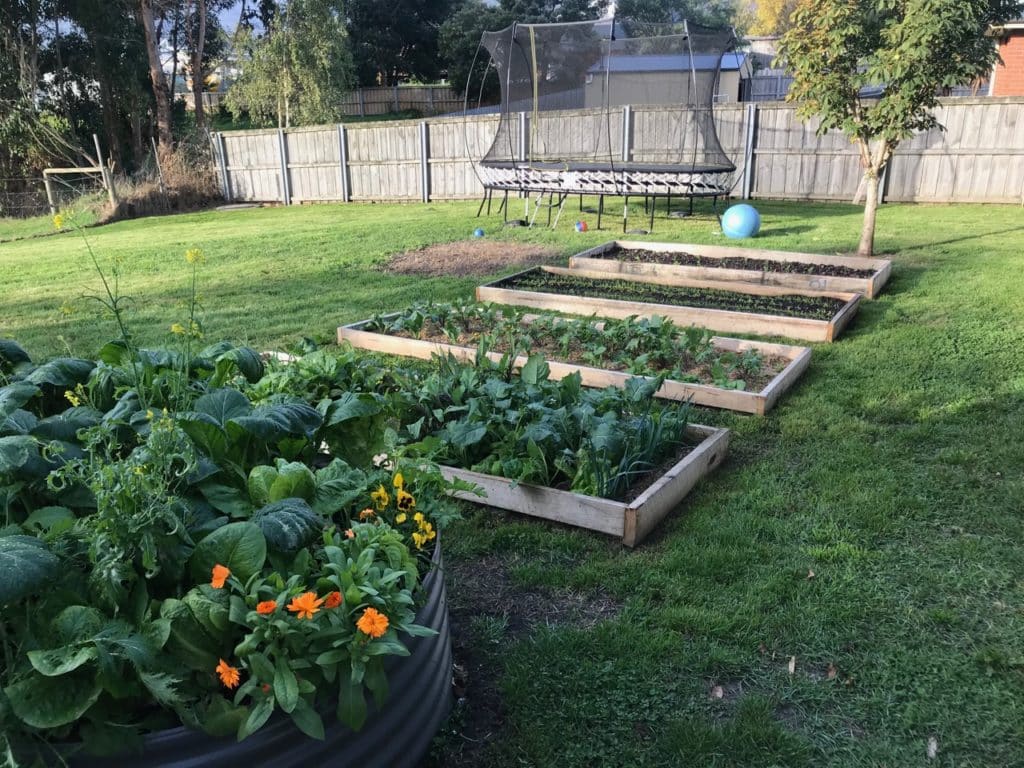
Planting the beds
Then we got down to the business of planting – by this time it was February, so getting towards the end of the main growing season in Southern Tasmania.
For these beds, we planted mostly with seedlings (apart from the root-crop bed). If you can’t get seedlings and are starting from seed, here’s our best-ever seed raising mix recipe.
Hey also, if you’re coming out of (or into) a frosty time of year – here’s how to make and use cloches out of glass bottles for your seedlings.
-
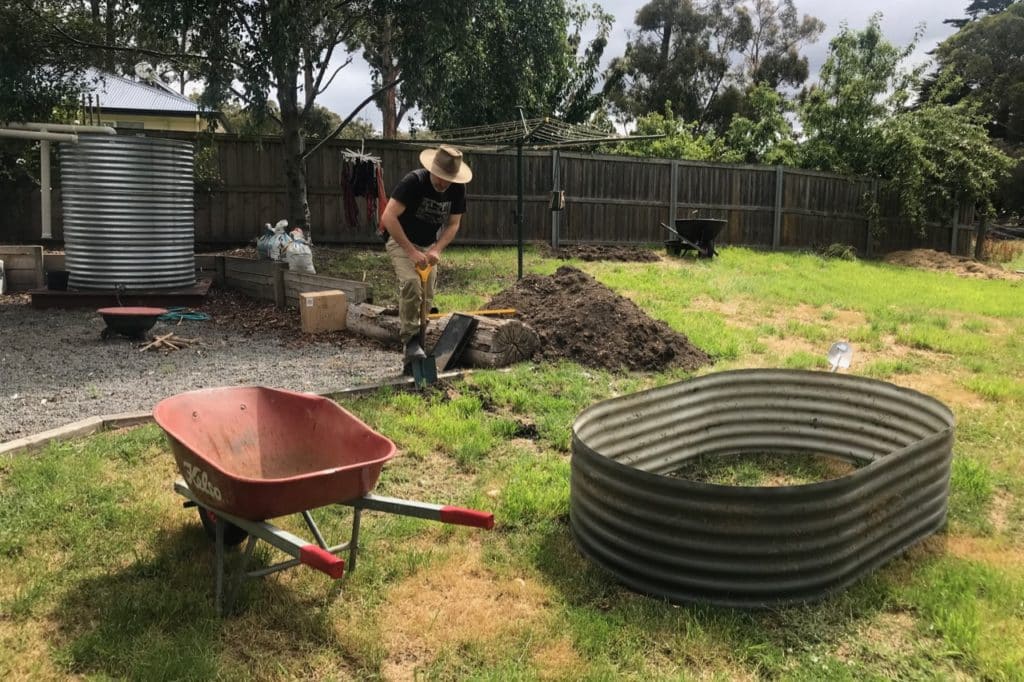
Nick moving the tank bed we found to a better spot -
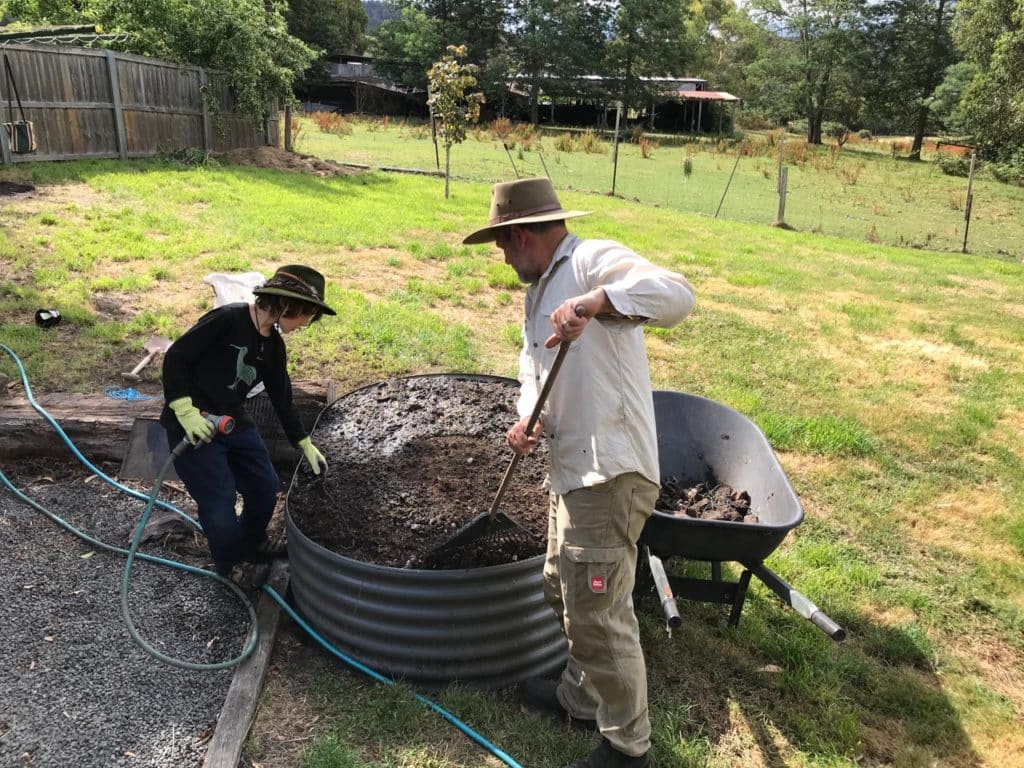
Loading the soil back in, and getting some moisture happening -
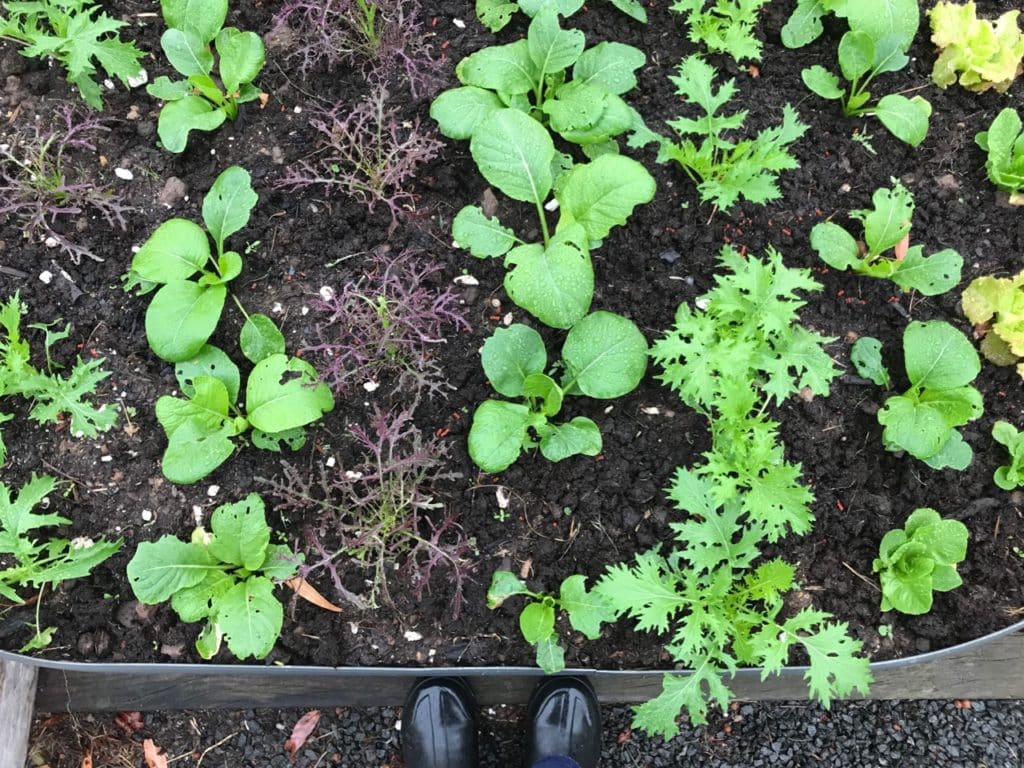
3 weeks in – L-R: mizuna, komatsuna, repeat -
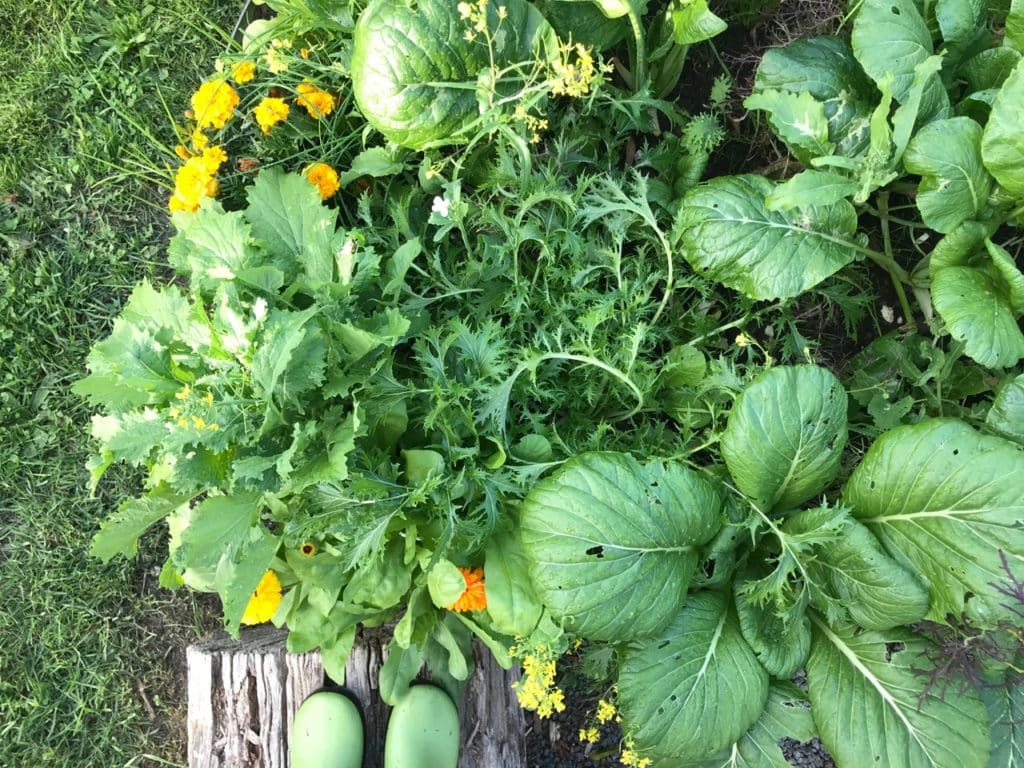
7 weeks in
Bed 1 (tank bed)
The first bed we planted was the one that was already here. As said, we moved it to a better spot, then planted it with quick salads – mizuna, komatsuna, lots of lettuce.
Poked in herbs at the ends. We were harvesting in a few weeks, and 8 weeks in, this bed is feeding us daily. We’ve tucked in a few more brassica seedlings and bunch of cloves of garlic, which will come up as the top layer of greens gets harvested.
-
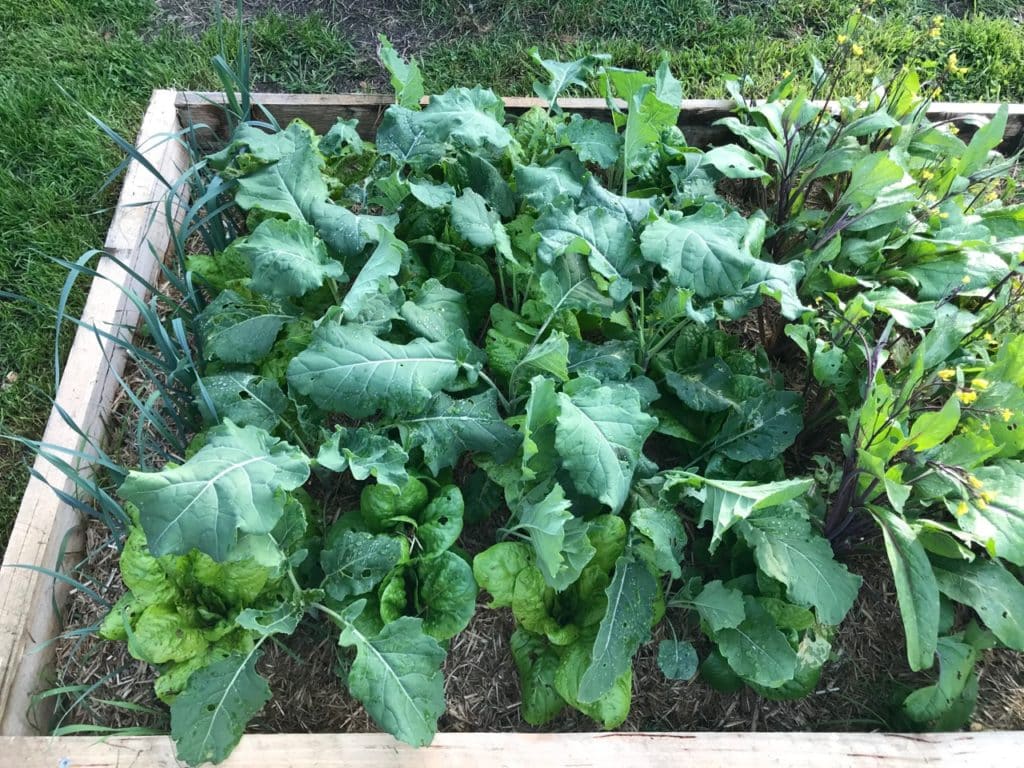
L-R: Leeks, lettuce, broccoli, lettuce, broccoli, lettuce, broccoli, lettuce, flowering asian green things (we’ll harvest the lettuces first obviously) -
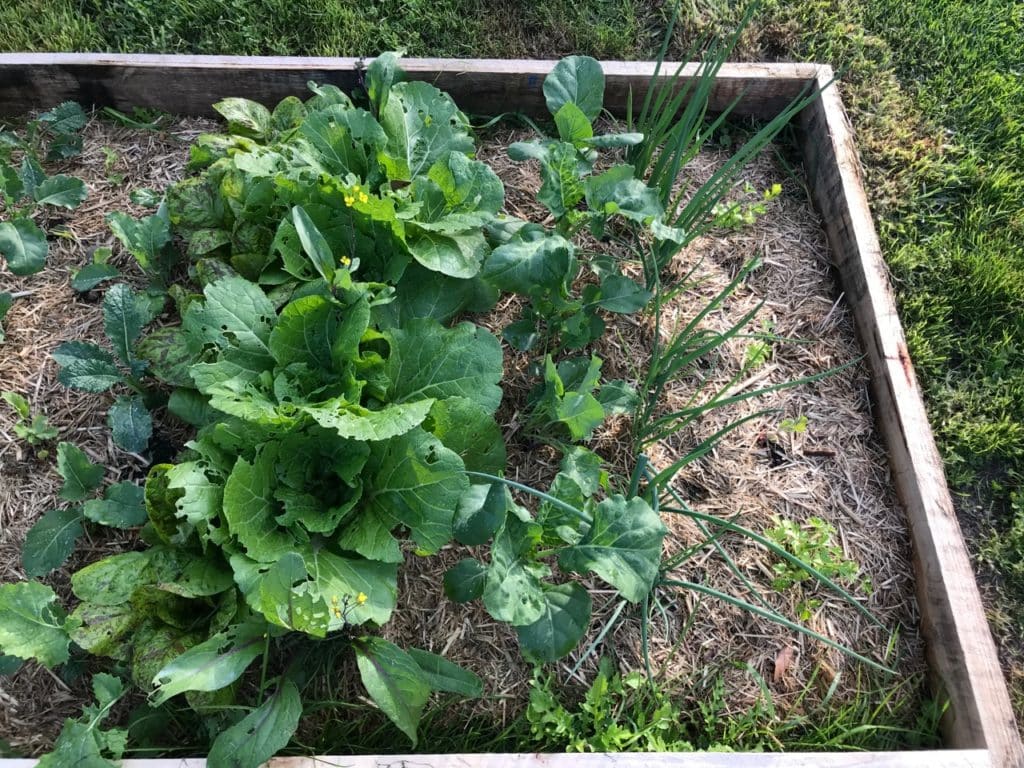
L-R: Parsley, kale, lettuce, wombok, broccoli, spring onion, parsley
Bed 2
The first new bed I planted, I planted the slips of leeks I was given in rows in the OPPOSITE direction to what we had planned. Bah – I don’t know why. It was that kind of day. Oh well. It will be ok. What matters is that we’re planting food, right?
This bed has rows of brassicas (sprouting broccoli mainly) with rows of quick-harvest crops like lettuces in between. Once the seedlings were over 15cm high and reasonable slug-proof, we mulched. Slugs love small seedlings and also mulch, so until they were strong seedlings, we left the soil bare – less space for slugs to hide.
-
-
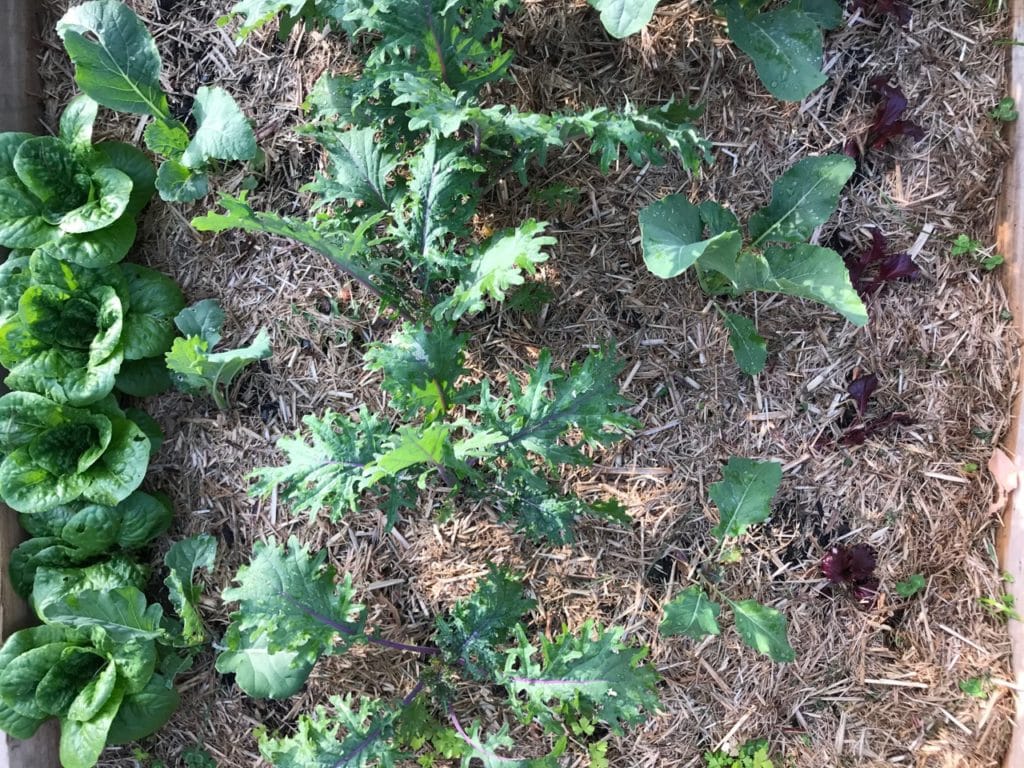
L-R: Lettuce, broccoli, kale, broccoli, lettuce
Bed 3
This bed was planted maybe a week after Bed 2. More brassicas (in the right orientation, this time!) – kale in the middle, sprouting broccoli on the sides.
And a row of lettuces dotted down each edge, again for a quick turnaround crop.
-
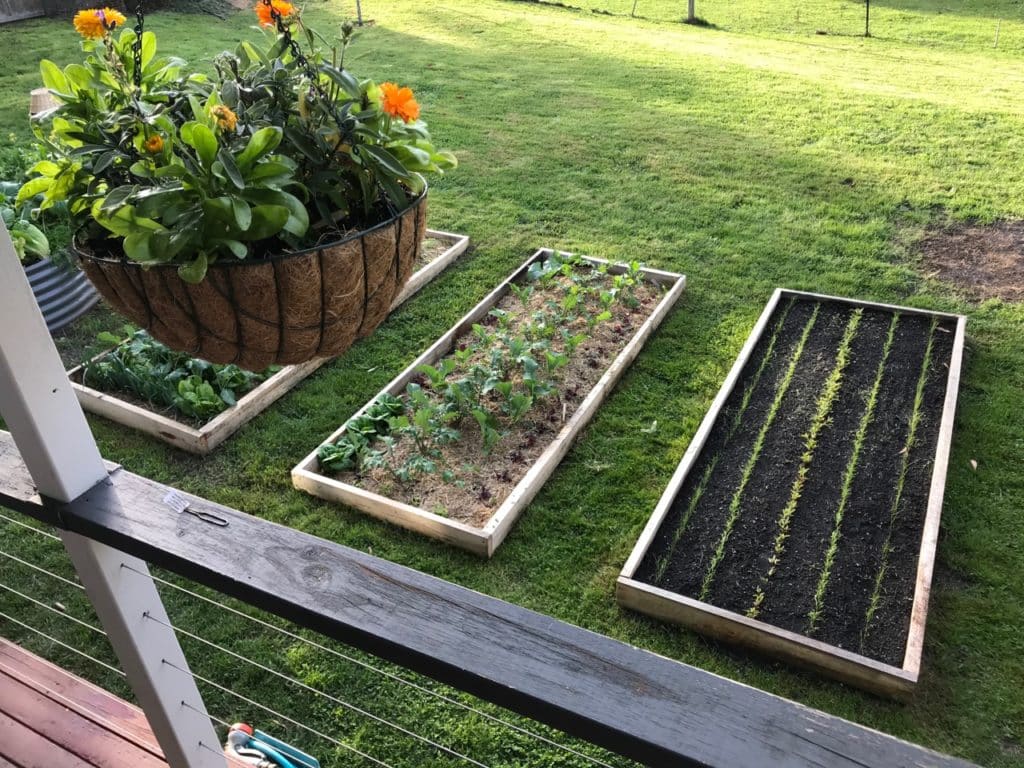
Root bed L-R: leeks/spring onions, carrots, beetroot, carrots, leeks/spring onions -
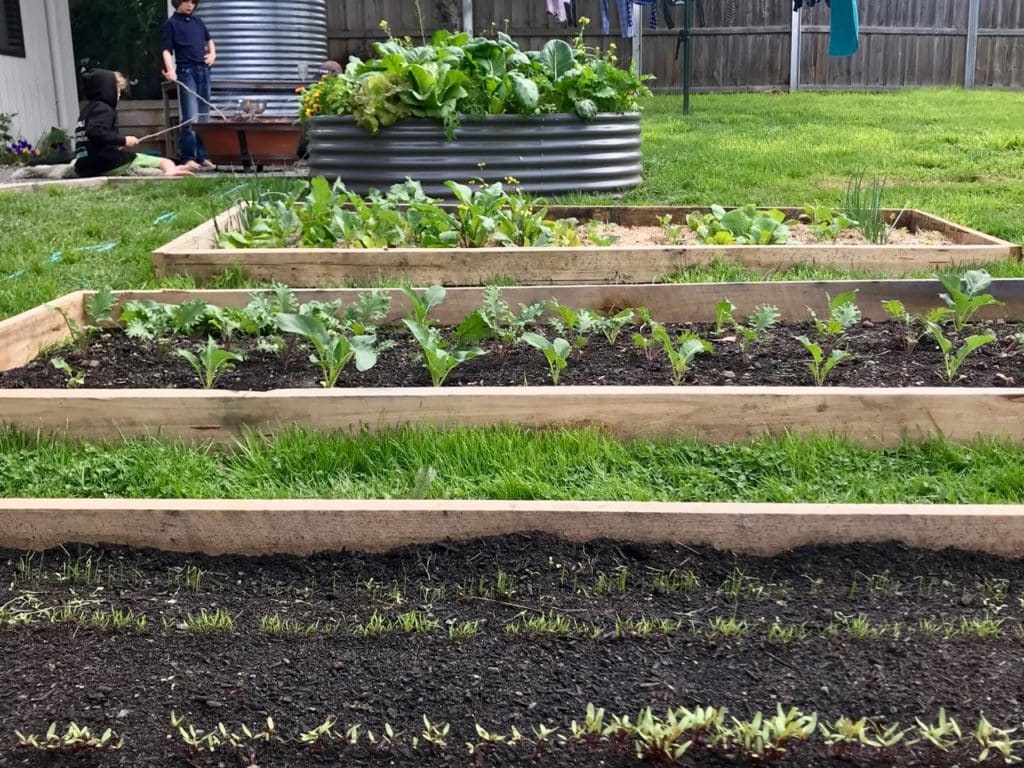
Little bitty beets, carrots and leeks rising. Kids in background tells me this pic was taken 2 weeks ago on our last day before physical distancing (March 15) – so 6 weeks into the garden’s construction.
Bed 4
This is our root crop bed – spring onions and leeks along either edge, then a row of carrots, beetroot in the middle, and another row of carrots. All planted direct as seed, and all at once.
Keeping shadecloth on this kind of bed until everything germinates is an excellent idea (see here for advice on that). This should be enough carrots to get us through till Spring, hopefully.
-
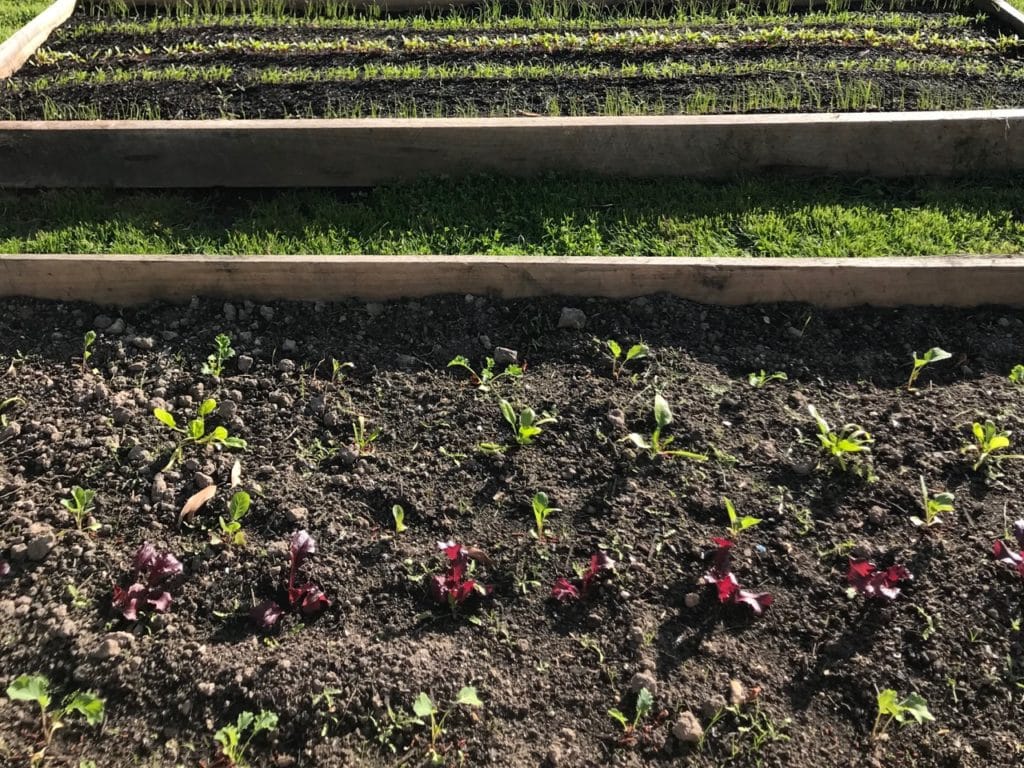
Top to bottom: sprouting broccoli, spinach, brussel sprouts, lettuce, kale -
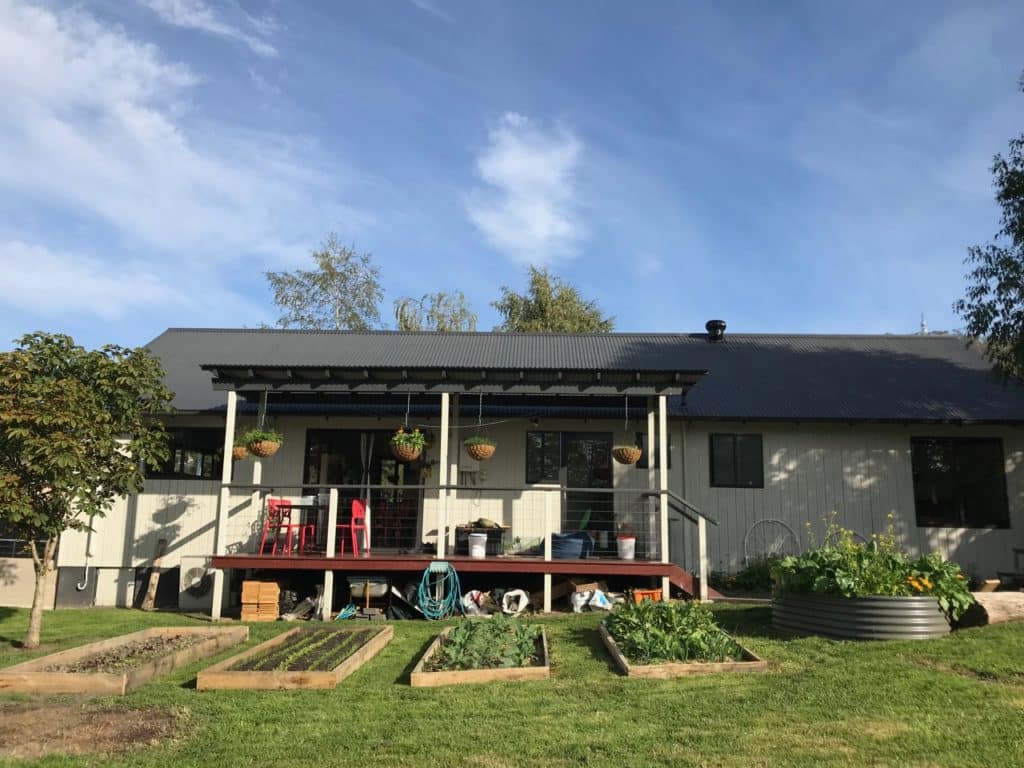
More food, slightly less lawn.
Bed 5
This bed was planted last, another rotation of leafy greens. Brussel sprouts, spinach, kale and more lettuce.
These brassicas should be ready later in the season – we’re trying to step our harvests a bit. It’s our first time growing in this climate though, so guess we’ll just see how we go.
-
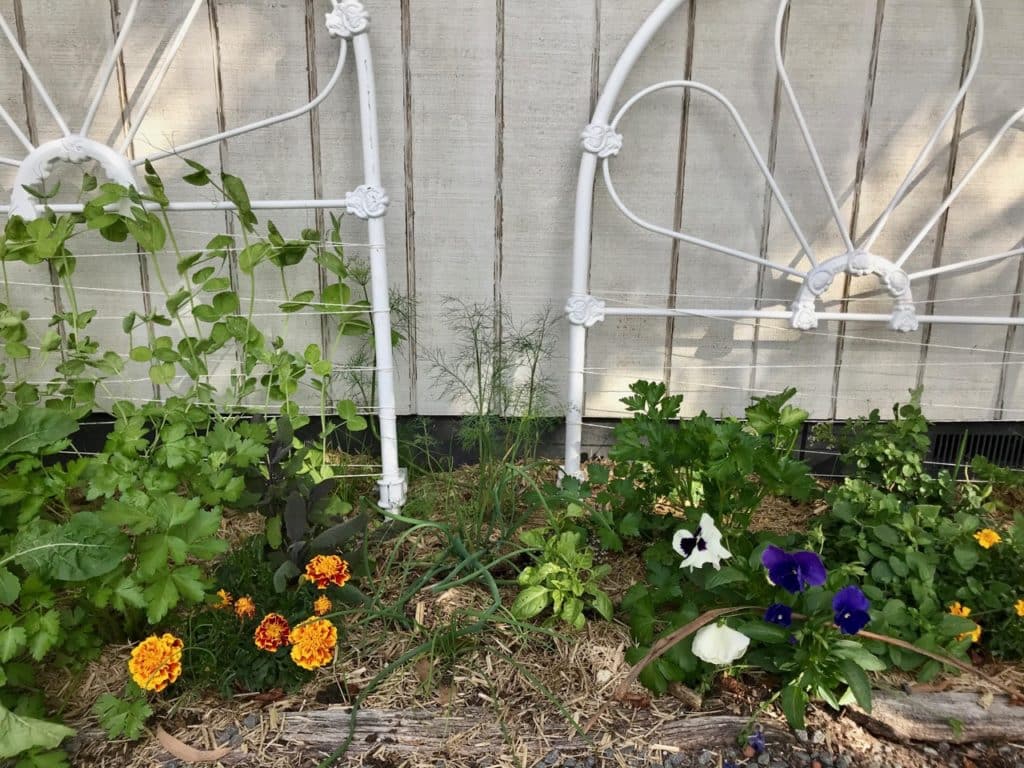
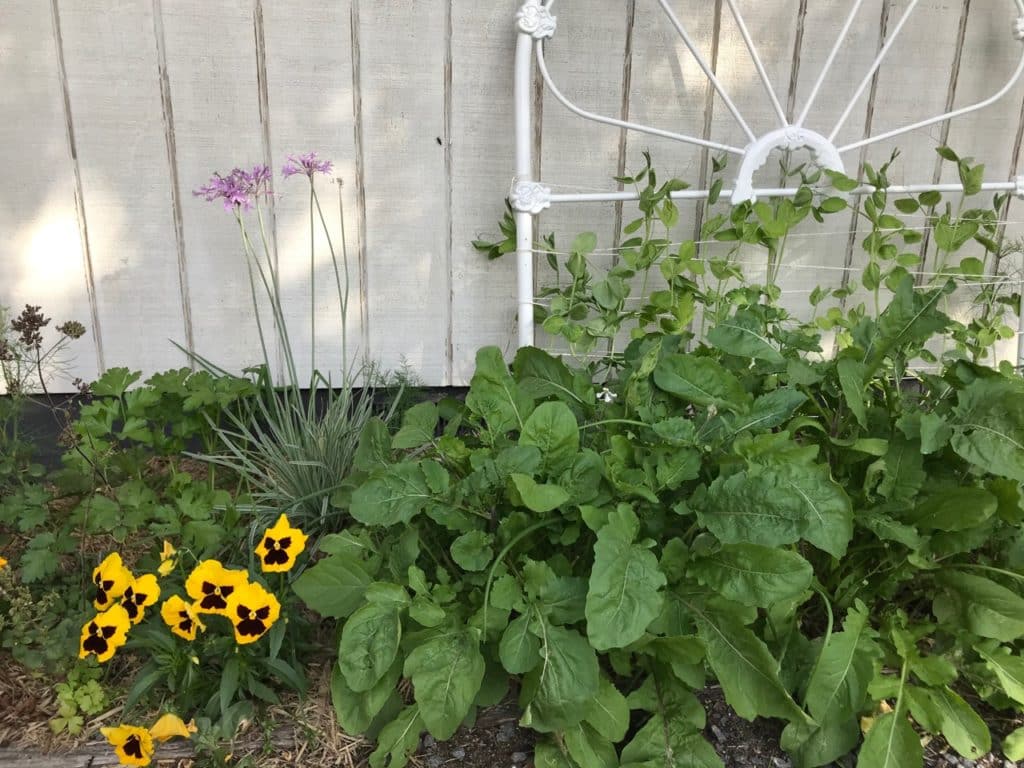
Purple podded peas on the trellis, with lots of herbs and flowers -
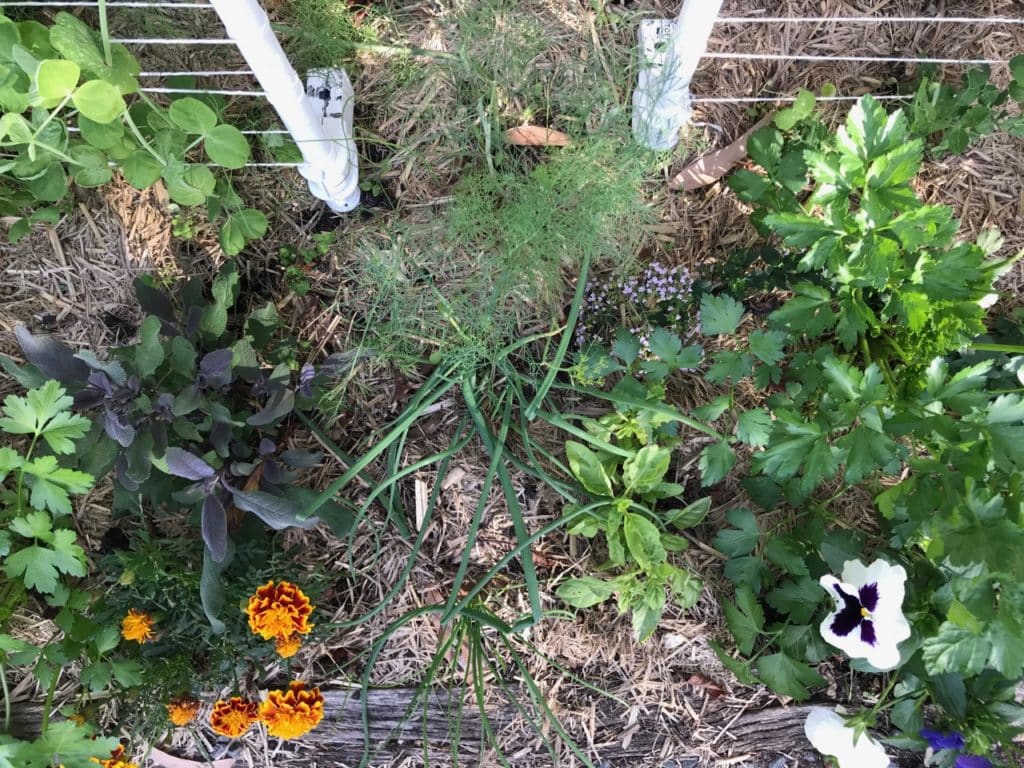
Parsley, sage, marigolds, spring onions, dill,basil, oregano, pansy -
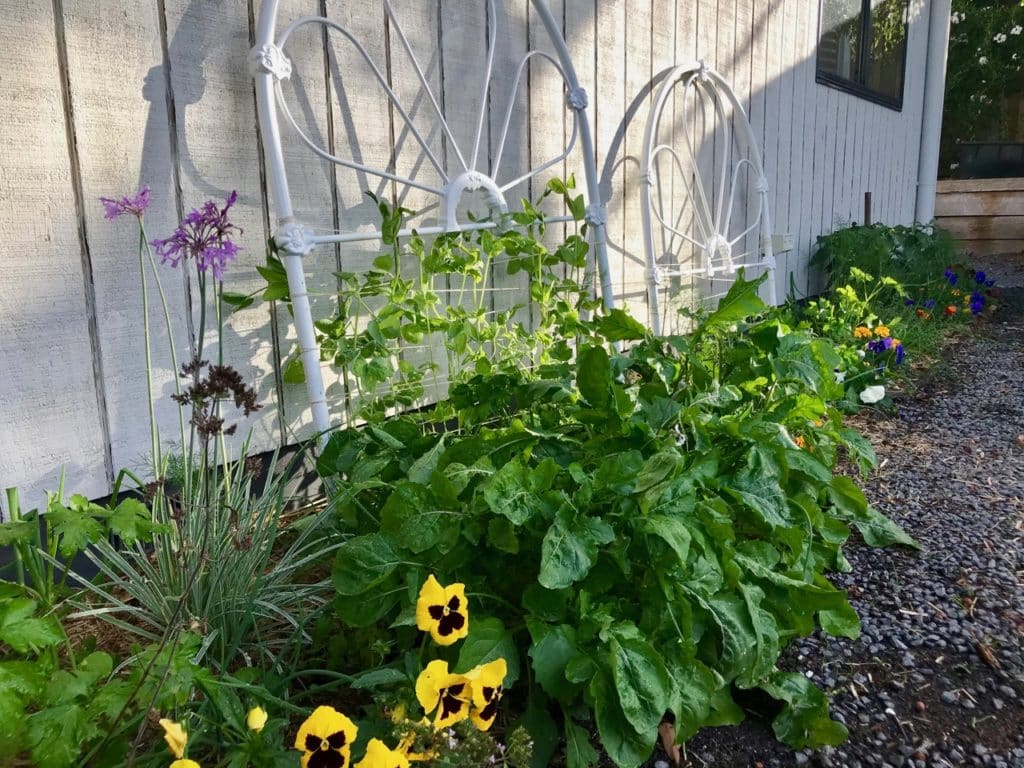
Rocket, rocketing along -
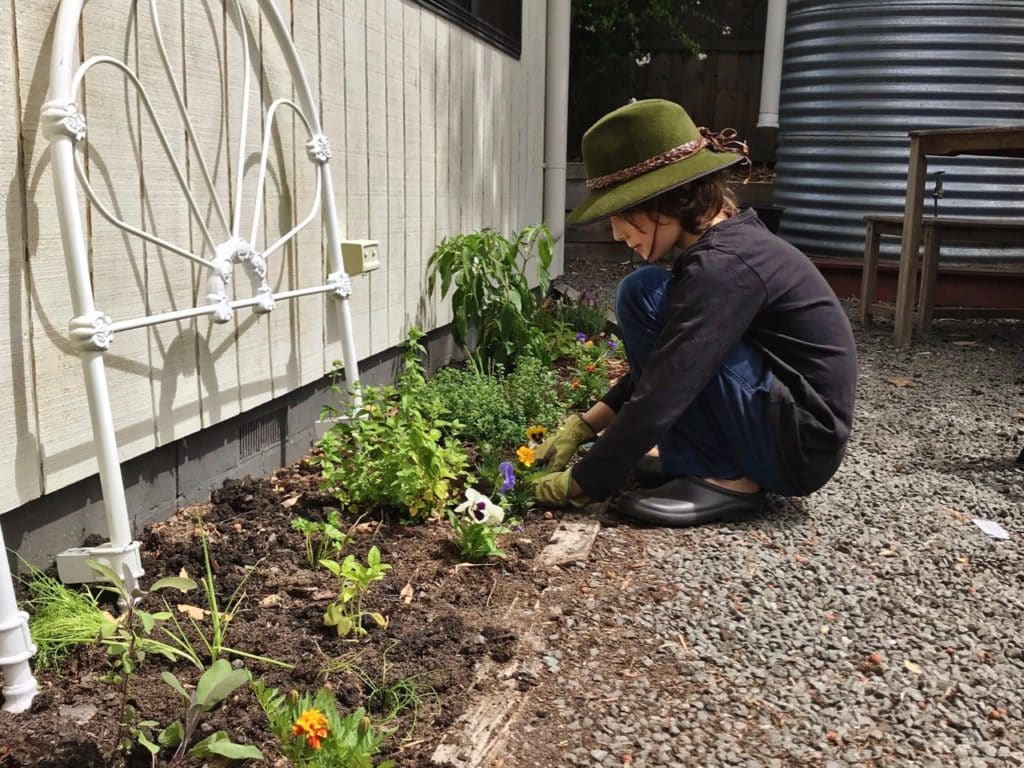
Ash planting more flowers
Reviving an exisiting growing area
Down the side of the house at the back, we had a north-facing (yay) 40cm strip that looked to have once been a garden. It only had 20cm deep of powder-dry dirt in it before you hit the house foundations. We can work with that.
For this bed, we first applied regular watering, to try and re-hydrate the soil a bit. After a week of that, We planted seeds, bulbs and seedlings in a polyculture (aka deeply random arrangement). When I say we, this was mostly our 10yo’s planting project, with a few suggestions from us.
A trip to the local tip shop yielded some iron bed frames that I snaffled to become pea and bean trellises – I strung some string across them for the purple-podded peas we planted. Peas and beans need different trellising assistance, by the way, so make sure you sort this out for maximum harvest:
We also tucked in random cloves of garlic, walking onions, seeds of all types, plus seedlings of all herby descriptions, which we thought would do well on a north-facing wall, and possibly be ok through a Tasmanian winter.
Then, we mulched it all with sugarcane waste. While mulch is not always the answer to every garden bed in every season (see the root veg bed above – mulch = slugs so we’re not mulching that bed right now), it’s a great way of protecting and enhancing your soil food web, as also retaining moisture in your bed.
So unless there’s a good reason not to, mulch with whatever carbon-rich, low-weed waste material you can get your hands on. Mulch, mulch, mulch.
And don’t forget the flowers! Flowers make everything better, and pollinators love them. A veggie garden without lots of flowers is not a garden.
Hanging herbs
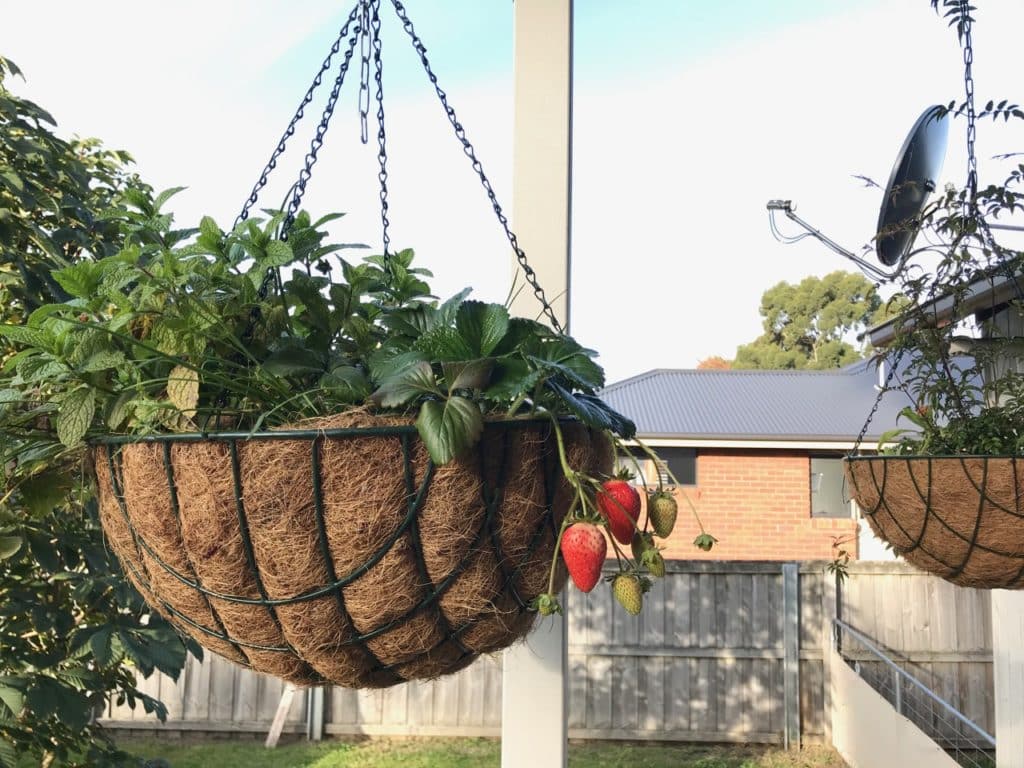
Forget not your porch. It is a growing space of its own. We have kept our back porch fairly free of potted things at ground level, because we wanted all the fresh-air-but-not-getting-rained-on floorspace we could manage. But hanging baskets are a given.
Hardy herbs are a great choice for hanging baskets, because baskets are excellent at drying out quickly. Despite the fact that they need regular watering, I love them for their cheerfulness, rodent-proof-ness and also their ability to put flowers RIGHT at your eye-level.
Our hanging pots are full of marjoram, thyme, chives, strawberries (with some mint poked in the middle), sage and a jasmine to make everything smell wonderful in spring. Also calendulas poked randomly in, wherever they will fit.
We scrounged and purchased our hanging baskets – but you can also make them…
- Hanging basket DIY ideas – but just use whatever you’re got.
Feeding the soil
Once you’ve got veggies in the ground, feeding the soil life in your beds is the main game – to get those veggies growing strong and healthy. There are lots of ways you can add nutrients. Never too much, or too often. Just a little, each week.
Compost
Get a compost going, if you have the space, and turn your kitchen scraps into plant-food.
For us right now, our compost system just a roll of wire. We clip this closed and lob into it small buckets of kitchen scraps, then cover those in grass cuttings and a bit of sawdust. And build that up and up. Once the wire surround is full, we unclip it, move the empty wire a meter to the side, re-clip, and then turn the semi-composted pillar back into the wire surround, again adding kitchen scraps and grass/sawdust ontop until it’s full. The repeat, until it’s compost.
This will result in a definitely-better-than-nothing compost. There are many other (better, fancier) ways to make compost too. What matters is that you’re capturing the nutrients leaving your kitchen, and re-purposing them back into goodness for your garden.
Worm farms
If you are more limited on space, worm farms are fabulous. They will take some of your kitchen scraps and turn them into nutrient-rich worm castings and worm wee. You can DIY your worm system, or buy one off the shelf.
- Here’s how to build or renovate a worm farm
- Bathtub wormfarms
- In-garden worm towers
- Great off-the-shelf worm farm (it’s an investment, but best design we’ve encountered that can handle decent volumes of scraps while being compact)
Seaweed fertilizer
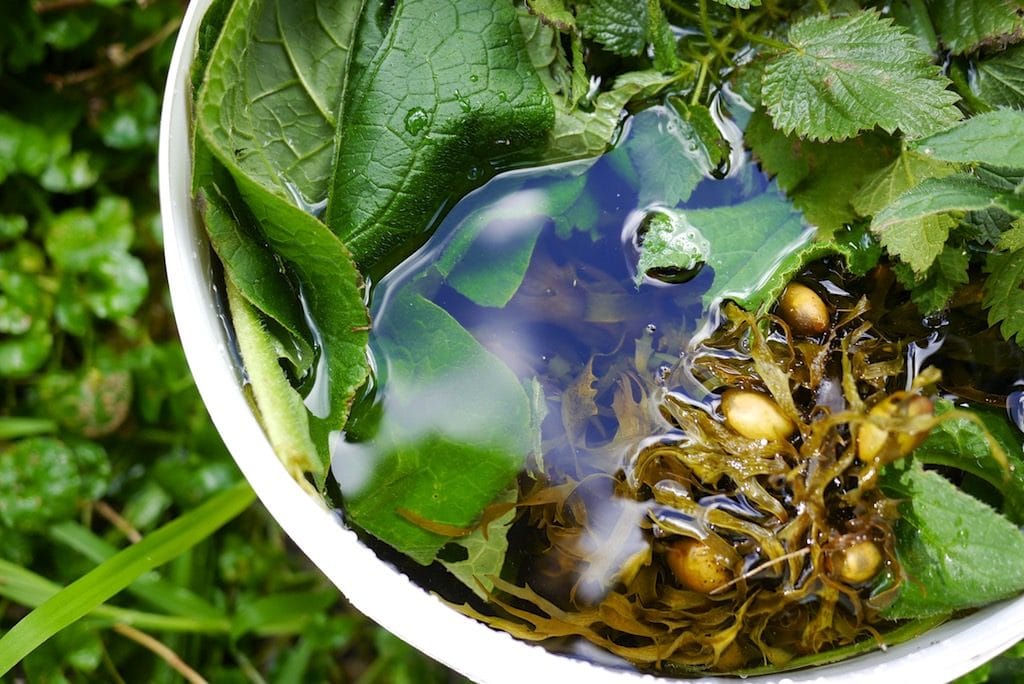
Live near the ocean? All the garden nutrients you need are on the beach, waiting for you. If you live somewhere that’s clean enough to forage beach-cast seaweed (and it’s allowed where you live) – get to it. Pull those nutrients up into your garden and get them into your soil, your food and into you! They will make their way back down to the sea eventually.
Liquid Gold
Wee is not just for the lemon tree! Urine is literally liquid gold for your plants. If you do just one nutrient-cycling technique, let it be this.
Find a private spot, and wee into a bucket. Then, dilute with lots of water, and pour onto your beds, one bed per day. Urine is absolutely FULL of goodness for your garden – and the fresher it is, the more sterile it is.
It has been quoted that ‘all the nutrients we need to grow enough food for one person can be found in our own urine‘. Just think on that for a second. Like any nutrients, less is more – don’t overload your garden beds with too much nitrogen. A little, though, is fabulous.
If you’re not familiar with this age-old technique, it can be kind of confronting. But you’ll get used to it, especially once you watch your veggies thrive. Obviously if someone in your household is sick, or on lots of medications, don’t include their wee in this routine. And wash your veg when it comes into your kitchen, as you would do anyway.
For us, we just keep a 10L bucket around the side of the house, and most wees get done into there, when we remember. Once a day, that 10L bucket gets filled up to the top with water (so at least a 1:10 ratio), and then poured around on a garden bed – no, not ON the lettuce, in-between the plants. Rotate between the beds each day, and there you have it. It’s not smelly, it’s free, its easy, and it super-charges your veggies with organic nutrients. You’re welcome.
- How we built a liquid gold urinal (as you do)
- Nick’s TedX talk on nutrient cycling (ah, memories!)
- All our humanure resources
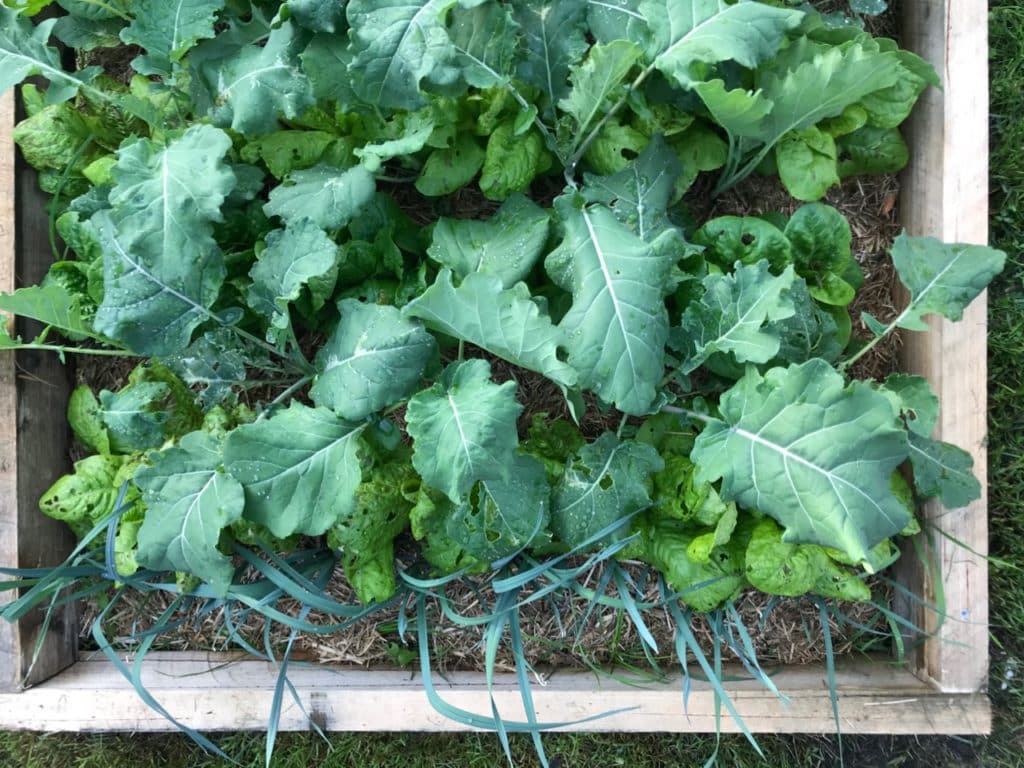
Lastly…
Ask whatever questions you like below, and we’ll do our best to answer them.
Don’t have a garden? No problem. Grow some sprouts and micro greens in your kitchen (here’s a video how-to) and you’ll be eating fresh greens in a few days time. Then, you can work out other strategies from there.
Ok that’s it from me, I’m off to thin the carrots. Take care, lovely humans x
This article is part of our Permaculture Living 2020 series – one everyday climate action for you each week. Now, during this pandemic, these ideas for self reliance, cultivating community and creating a liveable world for all, are even more important. Make sure you’re subscribed to our newsletter so you get more good ideas, tips and tricks for free each and every week.
The post 8 weeks to Victory! An 8-week veggie patch from scratch, in a rental appeared first on Milkwood: permaculture courses, skills + stories.

