Learning Electron – Part 2
Author: Stephen Downes
Go to Source
The story so far
In Part 1 I covered the basics of Electron up to and including building executable applications from the Node.js application.
In particular I looked at the fundamental role played by the package.json file in defining the application requirements, defining start and build scripts, and giving Electron a script to begin running, which we called bootstrap.js.
In turn, bootstrap.js set up communication between the different components, defined a browser window to house the application and loaded starting web page, and defined how the application should shut down.
I also encountered some issues with the examples provided in the Udemy course I was studying in order to learn Electron, and in articular, I noted how the working directory was defined differently in Node.js and in the executable application.
I didn’t know this at the time, but this would be the last time in the course we would actually build an executable application. We would create the applications but never test them. So there may be more problems like this lurking – I just don’t know about them.
Integrating Frameworks
One of the features that attracted me to Electron was the possibility of working with application frameworks I already knew, and in particular, jQuery and Bootstrap. This section covered the use of these frameworks in Electron.
Angular
The first of these was Angular. According to Google search, Angular is “a TypeScript-based open-source front-end web application framework led by the Angular Team at Google and by a community of individuals and corporations.” It’s a complete rewrite of AngularJS, the original Javascript version.
I haven’t worked with Angular before, so this part of the course wasn’t as useful as it might have been. Nonetheless I worked my way through the examples and followed what was going on.
Angular is integrated using three Node modules (all loaded using npm install): electron-angular, electron-reload, and elegular. In Angular, you define an ‘app’ which will have various ‘views’; these views are defined using TypeScript, JS and a mapping. Most of the lesson was devoted to creating these.
To run Angular in Electron, we throw out the bootstrap.js file and build a startup file created specifically for Angular (this was the only case where we did this). All we did with Angular was to create a basic start page. The package.json file looked the same as in previous cases, and the application was launched using the start script, just as before.
Nothing in this section gave me any reason to want to work with Angular in the future. I’m sure it has its merits, but these were not on display here.
Photon
I had never heard of Photon before so I was interested in this section. As it turns out, Photon was intuitive and slick – exactly the opposite of Angular. Photon was written specifically for Electron, so it’s no surprise the two work so well together.
With Photon you do not install it using npm. Rather, you download it and install it into the directory you created for your electron project. Photon itself is mostly a collection of stylesheets and fonts, all assembled using a gruntfile, which automates the installation process.
This means that the only dependency listed in package.json was electron-reload, which we’ve seen before. This is a really interesting function. What it does is update the Node application any time a fle changes, so you can make changes in the HTML and Javascript and see them right away, without having to stop and restart your application.
The bootstrap.js file was basically the same as before, with the only difference being that ti was called main.js and the starting HTML page was called main.html. I don’t know why this was the case.
Photon works by giving you predefined class names for HTML elements. So, for example, you could have div class=”panegroup” containing three instances of div class=”pane” and you’ll get three nice neat columns. That is what we created in this section.
Photon is pretty basic, but what you get if you use it is an application that looks like an application. That’s important in that it makes people comfortable with your application; it doesn’t look like there’s anything weird going on.
Bootstrap
I know Bootstrap pretty well. I used it along with jQuery to develop the gRSShopper look and feel. Like Photon, it defines a set of classes you can use to style HTML elements. It also has a lot of interactivity, doing things like opening tabs and launching modal windows.
One of the attractions of using Bootstrap is its support for ARIA – Accessible Rich Internet Applications – a W3C accessibility standard. I’m not sure whether this support extends through Electron, but it’s at least a starting point.
Installing Bootstrap was very straightforward – set up package.json and main.js as before, and thn install bootstrap in the command window using npm install bootstrap. To use Bootstrap it’s exactly the same as on a web page – you need to use a style tag that points to the bootstrap.css file (it’s worth noting that the instructor had difficulty finding the .css file as it’s buried in the directory structure).
What was not covered was any of the Javascript functionality in Bootstrap. A lot of the value of Bootstrap is the way it manages page elements; it uses jQuery and adds Javascript of its own. These need to be defined in the document head using a link tag, and jQuery has to be installed using npm. None of this was shown in the course, and the instructor overall seems to be really unfamiliar with Bootstrap generally.
I didn’t test the Bootstrap Javascript functions, since I wanted to stick with the plan the course had set out. I would imagine they work fine, and it’s something to revisit later.
Webview
The next application was one that actually made me giddy: displaying pages from other websites inside our application. At this point it hits home – this isn’t a web page with framing. It’s a web browser, and it allows you to do things a website can’t do, like load pages from external websites.
The setup for this was super-simple, with no libraries to install and minimal Javascript. The work is done by the following lines:
Now what I’m not sure about, and what was not discussed, was whether (a) some web pages could pop our of this element, the way they can pop our of a frame on a web page, and (b) how much (if any) of the data from the web page can be accessed by the script.
In theory I should be able to do a page request and pull the content apart, but it is by no means clear that this is the way to do it.
Database
In addition to reading and saving local files, Electron can interoperate with a locally hosted database. I know from reading other articles that Electron can use database engines like Mongo and MySQL, but this course looked only at SQLite.
From the SQLite website we read: “SQLite is a C-language library that implements a small, fast, self-contained, high-reliability, full-featured, SQL database engine. SQLite is the most used database engine in the world. It is built into all mobile phones and most computers and comes bundled inside countless other applications that people use every day.”
I don’t know whether it’s preinstalled in most computers, but I had to download it from the website and install it. It was a very straightforward installation; I downloaded the Precompiled Binaries for Windows and ran the installer. There are several files you can download, and the course provided no guidance about these whatsoever (again, none of this appears to have been tested on Windows).
There are two npm modules to install. The first is called Knex (knex = connects – get it). This is a general-purpose SQL query-building library for Javascript. The second is the specific SQLite3 module for Node. These were installed using npm install and automatically appeared as dependencies in package.json.
We breezed through setting up basic CRUD functionality (Create – Read – Update – Delete) in Electron, including even a second window that acted as our data input window. Then, in a nice section called ‘splitting responsibilities’ we took the single page of code and split it into separate scripts for updating, deleting, etc.
This section took me a lot longer than it should have because, first, the wrong scripts were associated with the different modules, and second, one of the script download files was corrupt. This meant I had to follow along with the text as it was typed on video and recreate these download files for myself. Error-handing in the course was in general pretty weak, which meant I had to do a lot of spelunking to correct typos.
And once again, the utter indifference of the Udemy online support astonished me. The corrupt files are still corrupt. I was told they would “look into it”, they didn’t, and then told that “The uploaded file is heavy therefore some people are facing problem in downloading or in extracting the file. Hence we asked to drop an email.” It took them six days to actually send me the replacement file, and by then I had recreated it, uploaded it on my website, and posted a note in the discussion telling people where to find it.
I also noticed that when I ran SQLite for a large number of inputs at once it generated quite a few errors because SQLite was “busy”. That probably would not have happened with a proper database. In any case, there was no discussion at all of error-handling and data integrity.
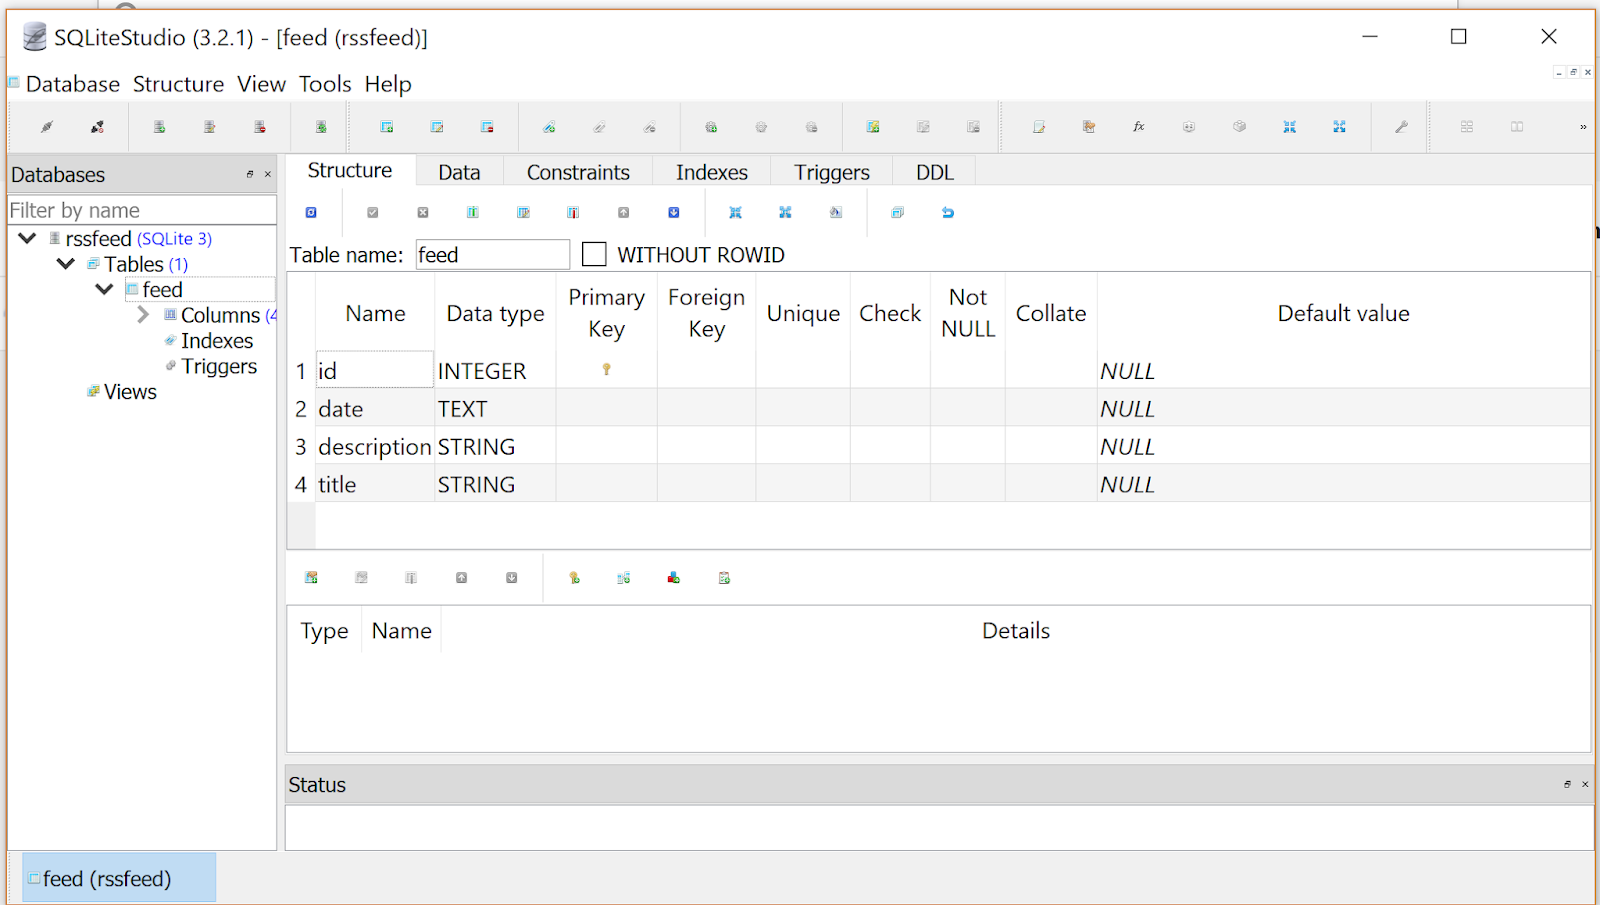 |
| SQLite Studio Interface |
Feed Reader
This section was at the core of my interests, but also created a major distraction, again because of a corrupt download file (which was never sent to me, even though I asked) and because of poor error handling.
The feed reader bings together several Electron functions:
– it retrieves content from the web
– it parses that content with an XML parser (SAX, to be specific)
– it displays the results on a web page
– it stores the results in a database
The ‘request’ function is built into Node so you don’t need to install a module. We needed both Knex and SQLite3 for the database, and in addition, feed-parser to parse the RSS feed. Note the hyphen. There are several feed parsers for Node, including one with the same name (but without the hyphen). Inside the code, the instructor uses ‘feedparser’ to refer to ‘feed-parser’. Not clear at all.
So I copied the code from the video and ran it and got “error in parsing”. That’s it. I studied the code and couldn’t find a typo or any error at all. Stumped.
Digression: Learning Node
At this point I wasn’t sure whether I had encountered an Electron problem or a Node problem or what. So I decided that I should spend some time on Node itself. If I could get a feed reader working in Node, then I could figure out why it wasn’t working in Electron.
This proved to be less easy than I thought it would be. There are various feed reading packages in Node, but it wasn’t clear to me how any of these worked or how they would be used in a web server or Node environment. I would have to go back to basics. This one in particular looked like the one to use. It even had examples – but not examples that made any sense to me.
What I did find was the W3C Schools tutorial on Node. W3C Schools is excellent; I’ve used them for things like Bootstrap with great success. Working through all these examples I found after that I could distinguish what part of the Udemy course was Electron and what part was Node. I also found this really useful video describing the Node event loop (great graphics, but it starts in a really weird manner, with the speaker showing us his underwear).
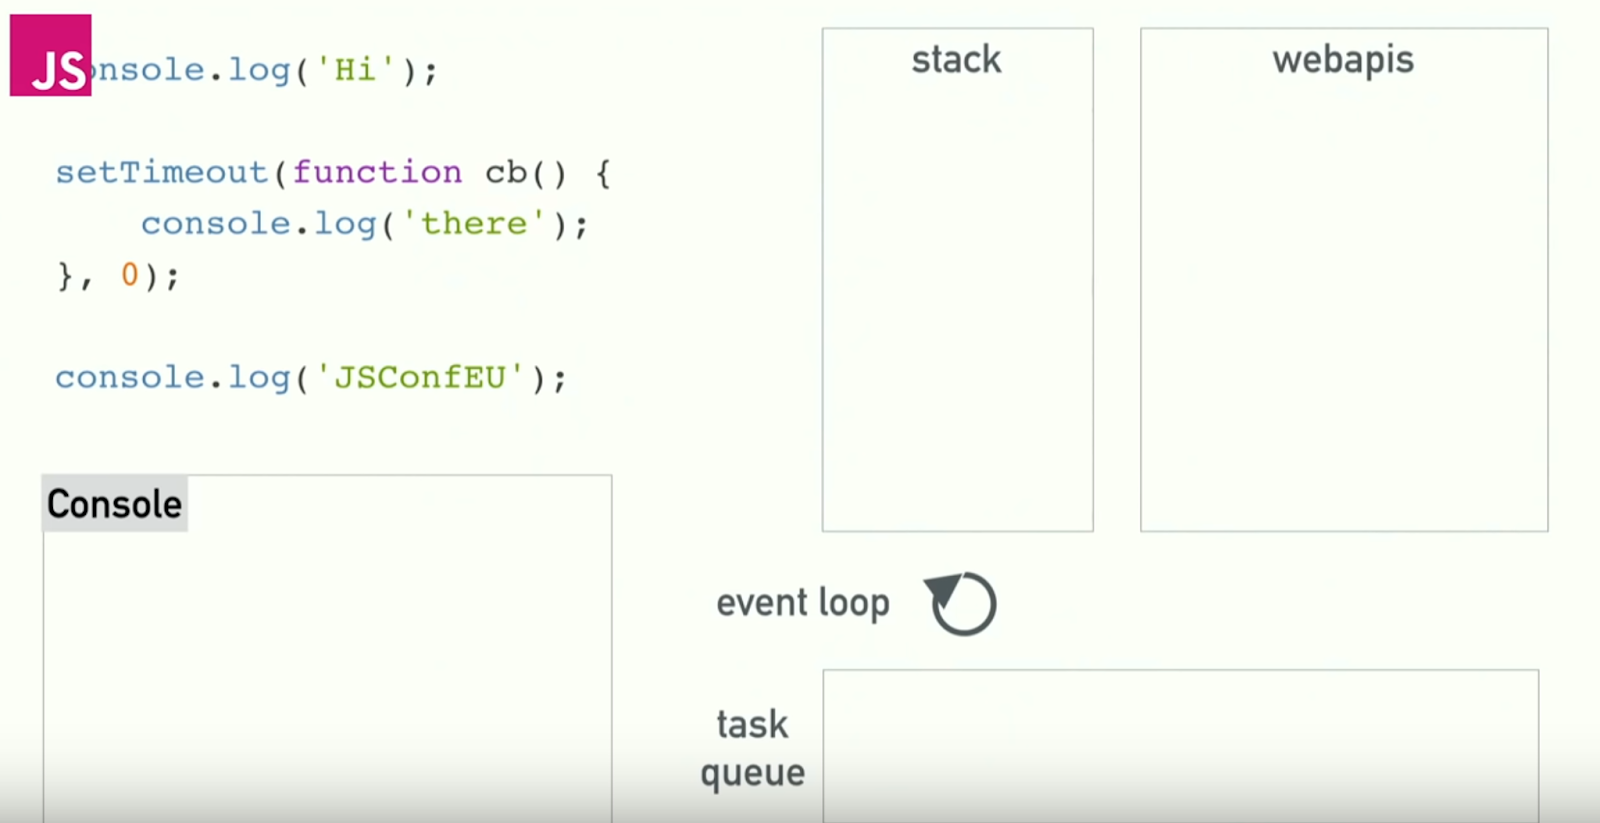 |
| Node stack and events |
So when a Javascript program runs, as each function is called, it is put on top of the stack. When the program completes, it is removed from the stack and the value it produced (if any) is passed to the next function on the stack.
In an event-driven program like Node, some functions are not called until an event happens. For example, your web page might sit there and wait until you click a mouse.Once you click the mouse, things happen. So these event-driven functions are listed in the ‘webapis’ box. When one of them is called, it is moved to the end of the task queue. When the stack is empty, then Javascript begins processing the first function in the task queue.
So I kind-of knew all this, but this video made it really clear. But it didn’t actually get me closer to solving my problem. I had to look at a bunch of Stack Overflow pages (using a variety of different search terms like ‘handling errors in Node feed reader’). So here’s how it works (and this is a very general Javascript pattern with I should have figured out a lot more quickly):
– you call a function (like, say, readWeb())
– you might pass a value to this function (like, say, readWeb(url))
– you might define some event handlers to handle different types of events (like, say, readWeb(url,{event-handlers}))
– each event handler has two parts: the name of the event, and a function to run (like, say, readWeb(url,{on “finished”: printFile(result)}))
– and, significantly, an error is one of those events you want to handle.
So that was how it was set up in the feed parser script in the Udemy course:
I’ve really simplified this example so it’s clear what’s going on. ‘req’ is the request, and once the event ‘response’ happens, it streams the result ‘res’ to ‘feedparser’.
Feedparser does its thing, and then it might return an event ‘error’, in which case it displays the message, or it might return an event ‘readable’, and write a report to the console log. In our case, it returned the response ‘error’.
But what was the error? It’s the value in the function being called in function(error). But in the course, we don’t do anything with this value. So all we get is a cryptic non-helpful message ‘error in parsing’. So I made a very simple change to the error function:
console.log(‘error in parsing: ‘+error)
Now it printed out the actual error. What was it? It wasn’t a parsing error at all! In the next part of the program I had types:
conosole.log(“Received readable parser”)
and the error was ‘No such function conosole()’. I had spelled ‘console’ wrong. I removed the extra ‘o’ and the parser ran perfectly, and I finished the module in about five minutes.
Two simple things combined to give me a miserable experience in this module: first, the corrupted download file, and second, the poor error handling in the example. Sure, it could be argued that my knowledge of Javascript and Node improved as a result, but that wasn’t due in any part to the course, but only because I’m really stubborn, and will drill down in these things until I find the problem, and make sure I know why the problem happened.
Anyhow, I also went a bit beyond the content of the course because it never did show how to find out what values are contained in the RSS feed item (if you print news.keys() you get a nice list) and how to get the link in the RSS feed item (news[‘link’]). It also doesn’t describe where to find and/or use feed information.
Calculator
The ‘capstone exercise’ in the course was ultimately pretty basic, and didn’t take advantage of most of what we had learned (and there were some mix-ups in the wrap-up and introductory videos that suggested that this was the ‘capstone’ from an earlier and even more basic version of the course).
What was different about this project was that we took a Node project from GitHub and adapted it to run in Electron. Specifically, we started with the kaidesu/calculator repository (I had to squint to read it off the video, then run a search on GitHub, because there are no written notes for any of the modules).
Most of the work was taken up in making inexplicable changes to the CSS to concert the calculator into a much more monochrome application. Why we did this was never explained, and it was actually done incorrectly, resulting in calculator keys that disappeared when you hovered over them.
We also rewrote the main calculator logic, taking the input as an expression that we evaluated in order to produce a result (we had to use regular expressions to convert ‘x’ to ‘*’ but there was no discussion of what a regular expression is, how it works in Node/Electron, nor why we were doing this).
The key-pressing and display functionality was handled by jQuery. Like other modules, jQuery is installed in Node using an npm install jquery command. Then, just as we had to do with Bootstrap, we had to find the actual jquery.js file in the subdirectory and create a link element pointing to it in our web page.
It would have been impressive had we actually built the application and an executable and tried putting it on a Windows machine and running it as an application (which is the whole point of Electron) but we didn’t do that.
So that was it. A bit anticlimactic, but I finished the course and got my certificate.

Lessons?
The course consists of about 290 minutes of video, or in other words, about five hours. So if you just sat down and watched all the videos, then you ‘completed’ your five hour course.
It took me a lot longer than that because I worked through every example, often reconstructing them from scratch, and solving problems as they came up (it was interesting because the instructor made a lot of coding errors in the videos (even running a Node update in the middle of one of them) so my examples wouldn’t run at first; I often anticipated how he would have to fix his code).
The course really suffered from being basically a video-only course. There were no notes or links except to the not-always-functioning download files. These files, meanwhile, were much larger than they needed to be, because they contained the entire application including all the required Node modules (which is exactly how these are not supposed to be distributed). It would have been much better had we had a GitHub repository to work from, downloading the actual electron code, and then running the installation.
There was no support despite the existence of a putative ‘TA’ and there was no community. It would have been nice to see some discussion in the discussion boards, but while the page claims some 350 or so people took the course, I could find evidence of only one or two people.
But.. I have the course 2.5 out of five.
It did do what I wanted it to do, which was to teach me Electron. I feel like I understand it really well now, and while I would need to actually build some things to develop any sort of expertise, I feel comfortable enough to take on a few projects. It was also clear enough that it allowed me to work in an unfamiliar Node environment, so that’s saying something.
And it showed me that, ultimately, Electron is a real thing, it was worth learning, and some of the things we see in Electron will be influencing the ed-tech landscape in the future.